The Shotput Ring
I designed the shot put ring from the dimensions of a stationary ring found at the Reggie Lewis Center, the location of all of our Winter Track meets.

I copied the U.S. official dimensions from this Site.
During the Winter Track season I noticed that the shotputters on my team have nothing to train on during the Winter Season. The Athletic department did not want to pay the hundreds of dollars needed to by a new shot ring, so I offered to make them one. The AD gave me a 200 dollar budget, and was able to buy every thing I needed (3 sheets 3/16" luan plywood 8x10, 1 sheet 3/4" 8x10 MDF) for $60.00 at home depot. From the official dimensions provided by the page linked above I was able to create a model of the ring on Pro desktop that followed the dimensions of the official exactly. In order to ensure that the whole thing was precisly cut to official specifications I planned to used the Shop Bot. (see the Shop Bot Tutorial for how I did this)
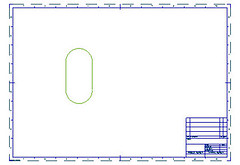
The base for the whole project was to be two sheets of luan layed out side by side in order to create the needed 8'x 8' base.
Into the base I cut 4 handles. I designed them in prodesktop and Part Wizard then cut one ot of every corner of the 8x8 square.
The toe board was the essential piece of the process. Without it I wouldn't have a ring.
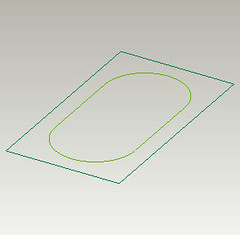
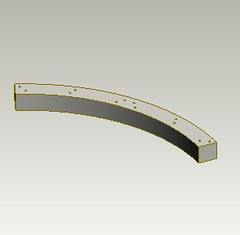
I designed the toe board to layer up. 5 layers would comprise the toe board. I milled the holes in the toe board so that I could insert dowels into them when I laminate them. That way I would be able to allign them perfectly.

I designed the toe board in Pro desktop in its entirty. I then used the top profile. (top view in engineering drawing) to create the cut lines. I put five of these on the Part Wizard Drawing. By laminating them later I would be able to acheive the height that I needed. I woudn't be able to cut such a tall piece on the Shop Bot easily. Because MDF is so dense, the cut speed of the Shop Bot was lowered to .5 inches per second (x y move speed). (less is preferable if attmpting complicated procedures)
I cut some short pieces of 1/4" dowel rod and used them to allign the pieces together as they were laminated. I used Grilla glue to glue them into one pair and one group of three. I now had two pieces of a toe board, one, three pieces of MDF thick, and the other was two pieces of MDF thick.
I cut the piece of the toe board on the Shop Bot after designing them in CAD(the one that is two pieces of MDF thick) in half in the center. To each of the pieces of luan that had handles in it, I attached these two pieces of the toe board using many counter sunk 1 1/4 drywall screws. The center cut of the toeboard lines up with the line created by the two touching edges of the middle of the base. Now, to put the Ring together, I only need to put dowel rods in the holes and lower the upper (whole) portion of the toeboard onto the lower (cut) portion. The dowels will line up and the two halves of the base will now be locked together.
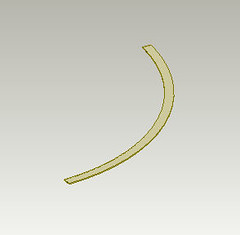
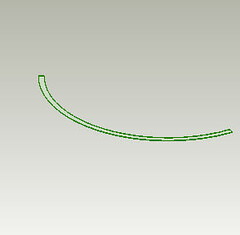
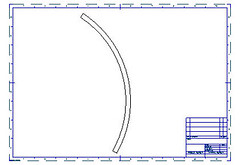
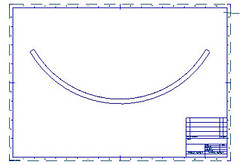
Next, after much difficulty I cut out the three portions of the outer ring out of 3/16" luan. I connected the right and left segments using short flat head screws. (I had predrilled pilot holes)

The lowest segment was cut in half in a similar manner as the lower MDF toeboard piece. I added a clasp simmilar to the one pictured below to pull the two halfs together when they are on the ground.

I undercut the smaller part of the clasp to ensure that the clasp will achieve an angle of over 180 degrees and stay there.
I attached the lower circle segment in the same manner as before for the other two segments. Now the whole thing can fold up and be transferred in three pieces (two halves, and the top part of the toeboard). All that is left is to paint the rim and the toe boar regulation white, set up the proper throwing area (see regulation sheet)
I finished the project well ahead of time and way under budget. The throwing coach really liked it, and the throwers all apreciated having something up to specifications to practice on.
Name of project
This is the portable Shot Put Ring
Who worked on the project
Goal of project
To design a portable, lightweight, indoor shot put ring to be layed on the floor of the lower middle shcool gym.
What products did your group create - include photos and links to cad/cnc files
CAD drawings and a finished product.
What was your role in the project
What role did CAD play in the project
It helped me design, make changes, and revise the prototype before entering the shop.
How did you use the design process on the project?
Point a link to the documentation
Pictures of the completed assembly will be added as soon as possible
Comments (0)
You don't have permission to comment on this page.